

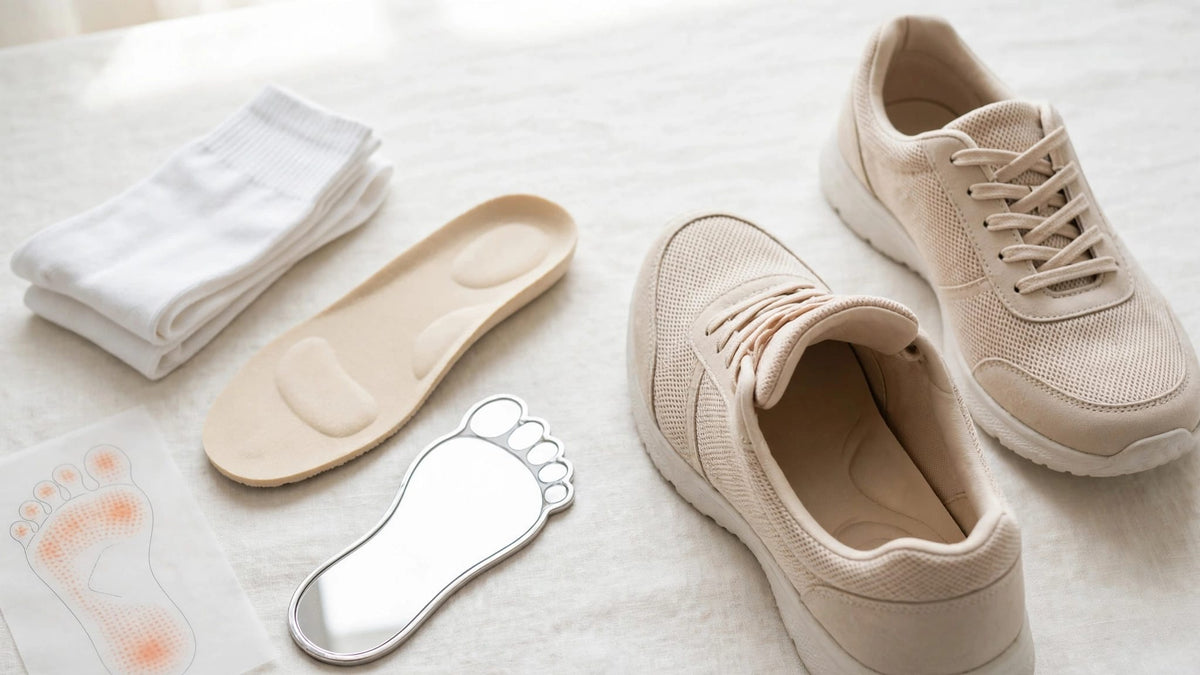
Shoe fit checks for reduced foot sensation should include more than a comfort test. Look at how each shoe fits and moves, then inspect your feet for pressure marks or skin damage after a short try-on.
When you can't reliably feel rubbing or pressure, a shoe can seem comfortable while irritating your skin. Visual checks help you spot problems that sensation alone may miss.
Start with both feet, your usual socks, and any inserts you plan to wear.
Why Reduced Sensation Changes Shoe Shopping
Reduced sensation can make it hard to notice a tight toe box, a rough seam, or a small object inside a shoe. It can also make rubbing difficult to detect while you walk. Diabetes-related neuropathy is one possible cause of reduced sensation, but it isn't the only one.
A shoe that feels fine on the sales floor still needs a close inspection. Look at the space around your foot, watch how the shoe moves, and examine your skin afterward. These observations offer useful clues, although they can't establish that a shoe is safe for every activity.
If you have diabetes, neuropathy, poor circulation, or a history of foot ulcers, seek individualized footwear advice from a qualified clinician. You may need a particular type of shoe or insert that an ordinary fitting can't replace.
Prepare for Shoe Fit Checks Before Trying On a Pair
The items inside your shoes affect the space available for your feet. Bring the socks and inserts you expect to wear most often, and assess both shoes together.
Measure Both Feet
Feet can differ in length and width, so measure each one while standing. Use the larger foot as your starting point, then assess how the shoe fits the smaller one. A size label narrows your options, but it doesn't describe every detail of a shoe's shape.
If you're shopping online, our guide to measuring both feet can help you choose a starting size. You'll still need to assess the pair on your feet because sizing varies between styles and brands.
Inspect Socks, Inserts, and Shoe Interiors
Choose clean socks that fit smoothly without bunching. Thick socks occupy more space than thin ones, and a raised seam can create pressure against a toe.
Before putting on a shoe, look inside for loose objects, folded lining, or a worn footbed. Run a hand with normal sensation along the interior to find rough seams or raised edges. If reduced sensation also affects your hands, ask someone to help.
Bring any prescribed orthotic or other insert to the fitting. It can change the room above your toes and across your instep.
Check Toe Room, Width, and Depth While Standing
Put on both shoes with your usual socks and inserts. Fasten them, then stand with your weight on both feet. A seated fitting can miss crowding that appears when your feet bear weight.
Look Ahead of and Around Your Toes
Find your longest toe, which may be your second toe rather than your big toe. It should have space ahead of it and shouldn't press against the front of the shoe. As a starting point, roughly half an inch of space is a common fitting guide, although the appropriate gap depends on the shoe and your foot.
Also look at the sides. Your toes should lie naturally without being squeezed together. A shoe can have plenty of length but still be too narrow across the forefoot.
If you need more side-to-side space, compare a wider fitting or a different toe shape before choosing a longer shoe. Our guide to finding a roomy toe box explains why those dimensions matter separately.
Check Above the Toes and Across the Instep
Depth is the space between the footbed and the top of the shoe. A low upper can press on a toenail or raised toe even when the shoe is long and wide enough.
Look for areas where the upper sits tightly against your foot. If you have a bunion, hammertoe, or another prominent area, pay particular attention to seams and stiff overlays nearby. An adjustable closure can change the hold across your instep, but it can't create extra depth in a shallow shoe.
Watch How Both Shoes Move When You Walk
After the standing check, walk a short distance on a firm surface. Turn and stop at your usual pace. If someone is helping you, ask them to watch for heel lift, sliding, or a change in your stride.
Check Heel Hold and Forward Movement
Your heel should remain reasonably secure without repeated rubbing. Some movement can occur as a shoe bends, but substantial or repeated slipping calls for another look.
Also watch for your foot sliding toward the front when you stop. Extra toe space won't help if the foot moves forward into it. If you must pull the laces very tight to keep the heel in place, compare another shape or size instead.
Notice Changes in Your Steps
Toe gripping, shorter steps, or an awkward turn can indicate that you're working to keep a shoe on. These signs deserve attention even if the shoe doesn't hurt.
Stop the try-on if you notice pain or irritation. Otherwise, keep the first walk brief and remove both shoes to inspect your feet. Our guide to proper shoe fit while walking covers additional movement checks.
Inspect Your Feet After the Try-On
Remove your shoes and socks, then look at each foot in good light. Check the toes, the spaces between them, the sides of the forefoot, the heels, and the soles. A mirror or a trusted helper can make the bottom of each foot easier to see.
Look for Localized Changes
Notice redness, discoloration, blisters, broken skin, or marks concentrated in one area. On darker skin, irritation may appear as a change in color rather than obvious redness. Compare both feet and look closely around toenails, raised joints, and any place where the shoe has a seam.
A mark can help you locate an area that needs attention, but it doesn't establish its cause. It may come from the shoe, a sock, or another source. Avoid continuing to wear a pair that leaves a concerning pressure mark.
Know What an Inspection Can't Tell You
An absence of visible marks after a short walk doesn't prove that a shoe will remain suitable during a full day. Pressure can develop over longer wear, and reduced sensation may make it hard to notice.
Likewise, a soft lining or cushioned footbed doesn't eliminate the need to inspect your feet. If you have an active sore or blister, don't continue the fitting as though the skin were intact. Contact a healthcare professional for guidance.
Compare Shoe Features With Your Needs
A product feature can give you a useful starting point, but no feature guarantees a safe fit. Compare the whole shoe with your foot and any advice from your clinician.
Adjustable Closures and Removable Footbeds
Laces let you adjust the hold across the top of your foot. The Ara Alexandria women's lace-up, for example, has an adjustable lace closure and a removable cushioned insole.
For a men's option, the Johnston & Murphy XC4 Prentiss 2.0 has a removable, dual-width footbed. Removability can be useful when an insert needs space, but it doesn't mean every orthotic will fit. Follow your clinician's instructions about whether to remove the original footbed or use the prescribed insert with it.
With any insert in place, repeat the standing and walking checks. The shoe still needs enough depth above your foot and a secure hold at the heel. Our guide to shoes for orthotics covers these fit details.
Wide Toe Boxes and Sole Protection
The Lems Chillum has a wide toe box and a removable insole. It's also a lightweight, thin-soled, zero-drop shoe, so it may not provide the protection or support you need.
If you have reduced sensation, discuss a switch to minimalist footwear with your clinician before trying it. A roomy front is useful only when the rest of the shoe also meets your needs.
Keep Checking Shoes and Feet After Purchase
Fit can change with the socks you wear, an insert, or swelling during the day. Inspect your feet daily and look inside your shoes before putting them on. Remove any small objects and smooth out folded lining or sock material.
For a new pair, start with a short wear period and inspect your feet afterward. Ask your clinician for a wear schedule if you have neuropathy, a history of ulcers, or prescribed footwear. Stop wearing the pair and seek advice if you find a blister, broken skin, or a concerning pressure mark.
Don't count on a break-in period to fix a cramped toe box. Leather may soften, but wearing a shoe won't add meaningful length or reliably correct its shape. Similarly, a loose heel is a reason to reassess the fit rather than tighten the closure until it presses into your instep.
When to Get Medical Help
Some changes call for a healthcare professional rather than another shoe size. Reduced sensation can make a small injury easy to overlook, so take visible changes seriously even when they aren't painful.
Seek Prompt Advice for Skin Damage
Contact a healthcare professional promptly if you find a blister, sore, or broken skin, especially if you have diabetes or poor circulation. Persistent redness, swelling, or recurring pressure marks also deserve attention.
Avoid putting the same shoe back on over the affected area while you seek guidance. Don't try to cut away a blister or treat a sore with harsh products on your own.
Act Quickly for Sudden or Spreading Changes
Seek urgent medical assessment for a foot that becomes newly red, hot, and swollen, particularly if you have diabetes. Spreading redness, fever, or signs of infection also require urgent care.
A suddenly cold, pale, or blue foot can signal a circulation emergency and needs immediate medical attention. New or worsening numbness deserves a medical assessment even if your skin looks intact.
Choose a Fit You Can Assess
When sensation is reduced, a comfortable first impression is only one part of choosing shoes. Check the space around both feet, watch the shoes in motion, and inspect your skin afterward.
If you need individualized footwear guidance, include your clinician in the decision. You can also visit us at Tip Top Shoes at 155 West 72nd Street in New York City to compare shoes with your usual socks and inserts.


